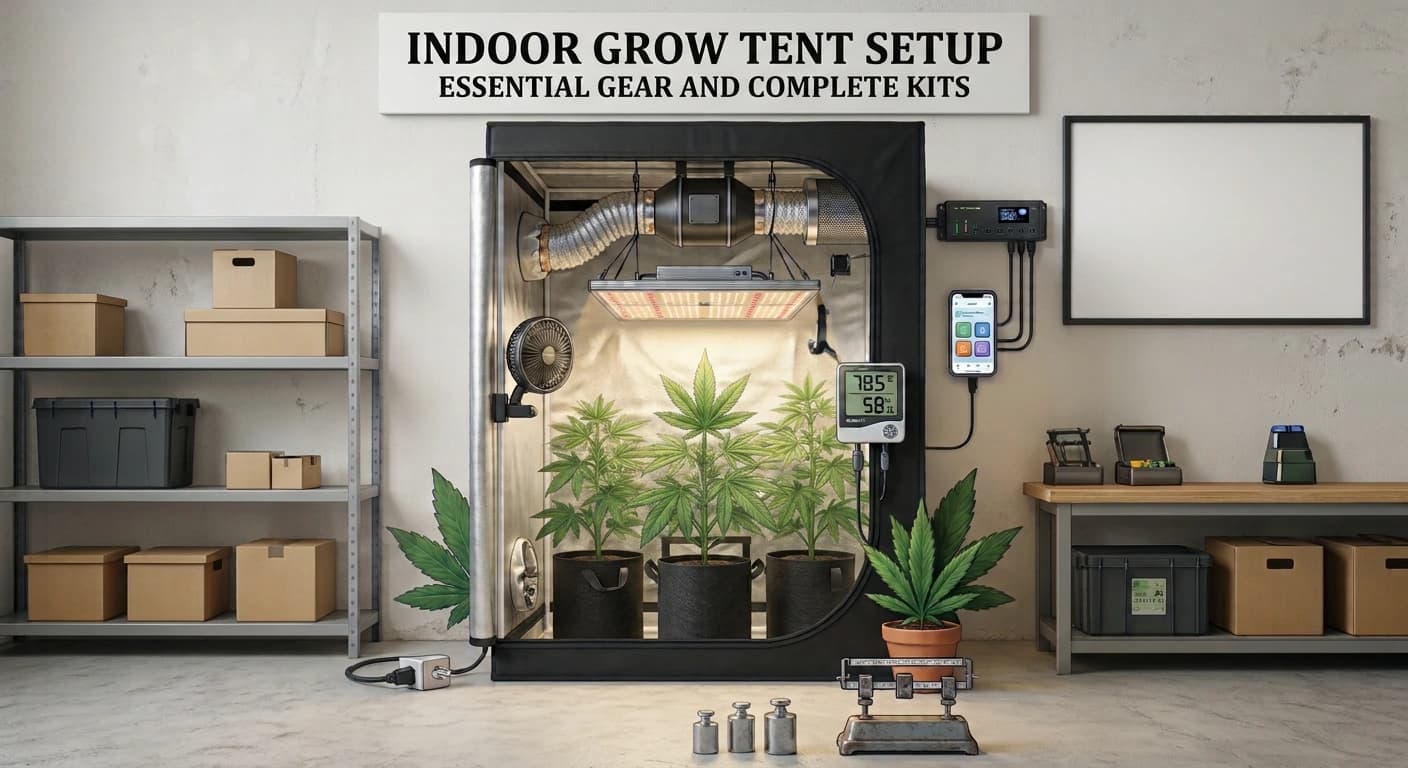
Setting up an indoor grow tent can feel confusing when you need to choose a tent, grow lights, fans, filters, and climate controls. With so many options, it can be hard to know what you really need and what works best together.
A good indoor grow tent setup starts with a few basics. You need a tent that fits your space, a suitable LED grow light, good airflow, and a way to check temperature and humidity. Choosing the right equipment can make your setup easier to manage. You can also visit the Mars Hydro AU store explore equipment for your growing space and browse our Technology and Gadgets guides for more helpful product tips and buying advice.
In this guide, we will explain what each item does, what to look for before buying, and whether a complete grow tent kit or separate equipment is a better fit for you. Whether you are just starting out or upgrading your setup, these tips will help you choose with confidence.
What Does an Indoor Grow Tent Setup Include?
An indoor grow tent setup brings several pieces of equipment together in one enclosed space. Each item has a specific job and they need to work well together.
The main components include:
Grow tent: Creates an enclosed space and helps control light and airflow.
LED grow light: Provides the light plants need to grow indoors.
Exhaust fan and ducting: Help remove warm, humid air from the tent.
Carbon filter: Helps reduce unwanted odors when needed.
Circulation fan: Moves air around the growing area.
Humidity control: A humidifier or dehumidifier helps manage moisture.
Sensors and timers: Help monitor conditions and manage equipment schedules.
You do not need every accessory from day one. Start with the essential equipment, then add more as your needs become clear.
Explore 5 Products
1. TS1000 Smart Complete Grow Tent Kit
Best for: Beginners with limited space who want an all-in-one setup.
This kit includes a 150W LED grow light, an 80 × 80 × 160 cm tent, ventilation equipment and accessories. The smart version also includes an iControl controller for easier scheduling and control.
Pros
Includes most essential equipment in one kit.
Smart controller helps manage lighting schedules.
Compact size fits small rooms or corners.
Cons
Best suited for small setups with around 1–2 plants.
Humidifier or dehumidifier may need to be purchased separately.
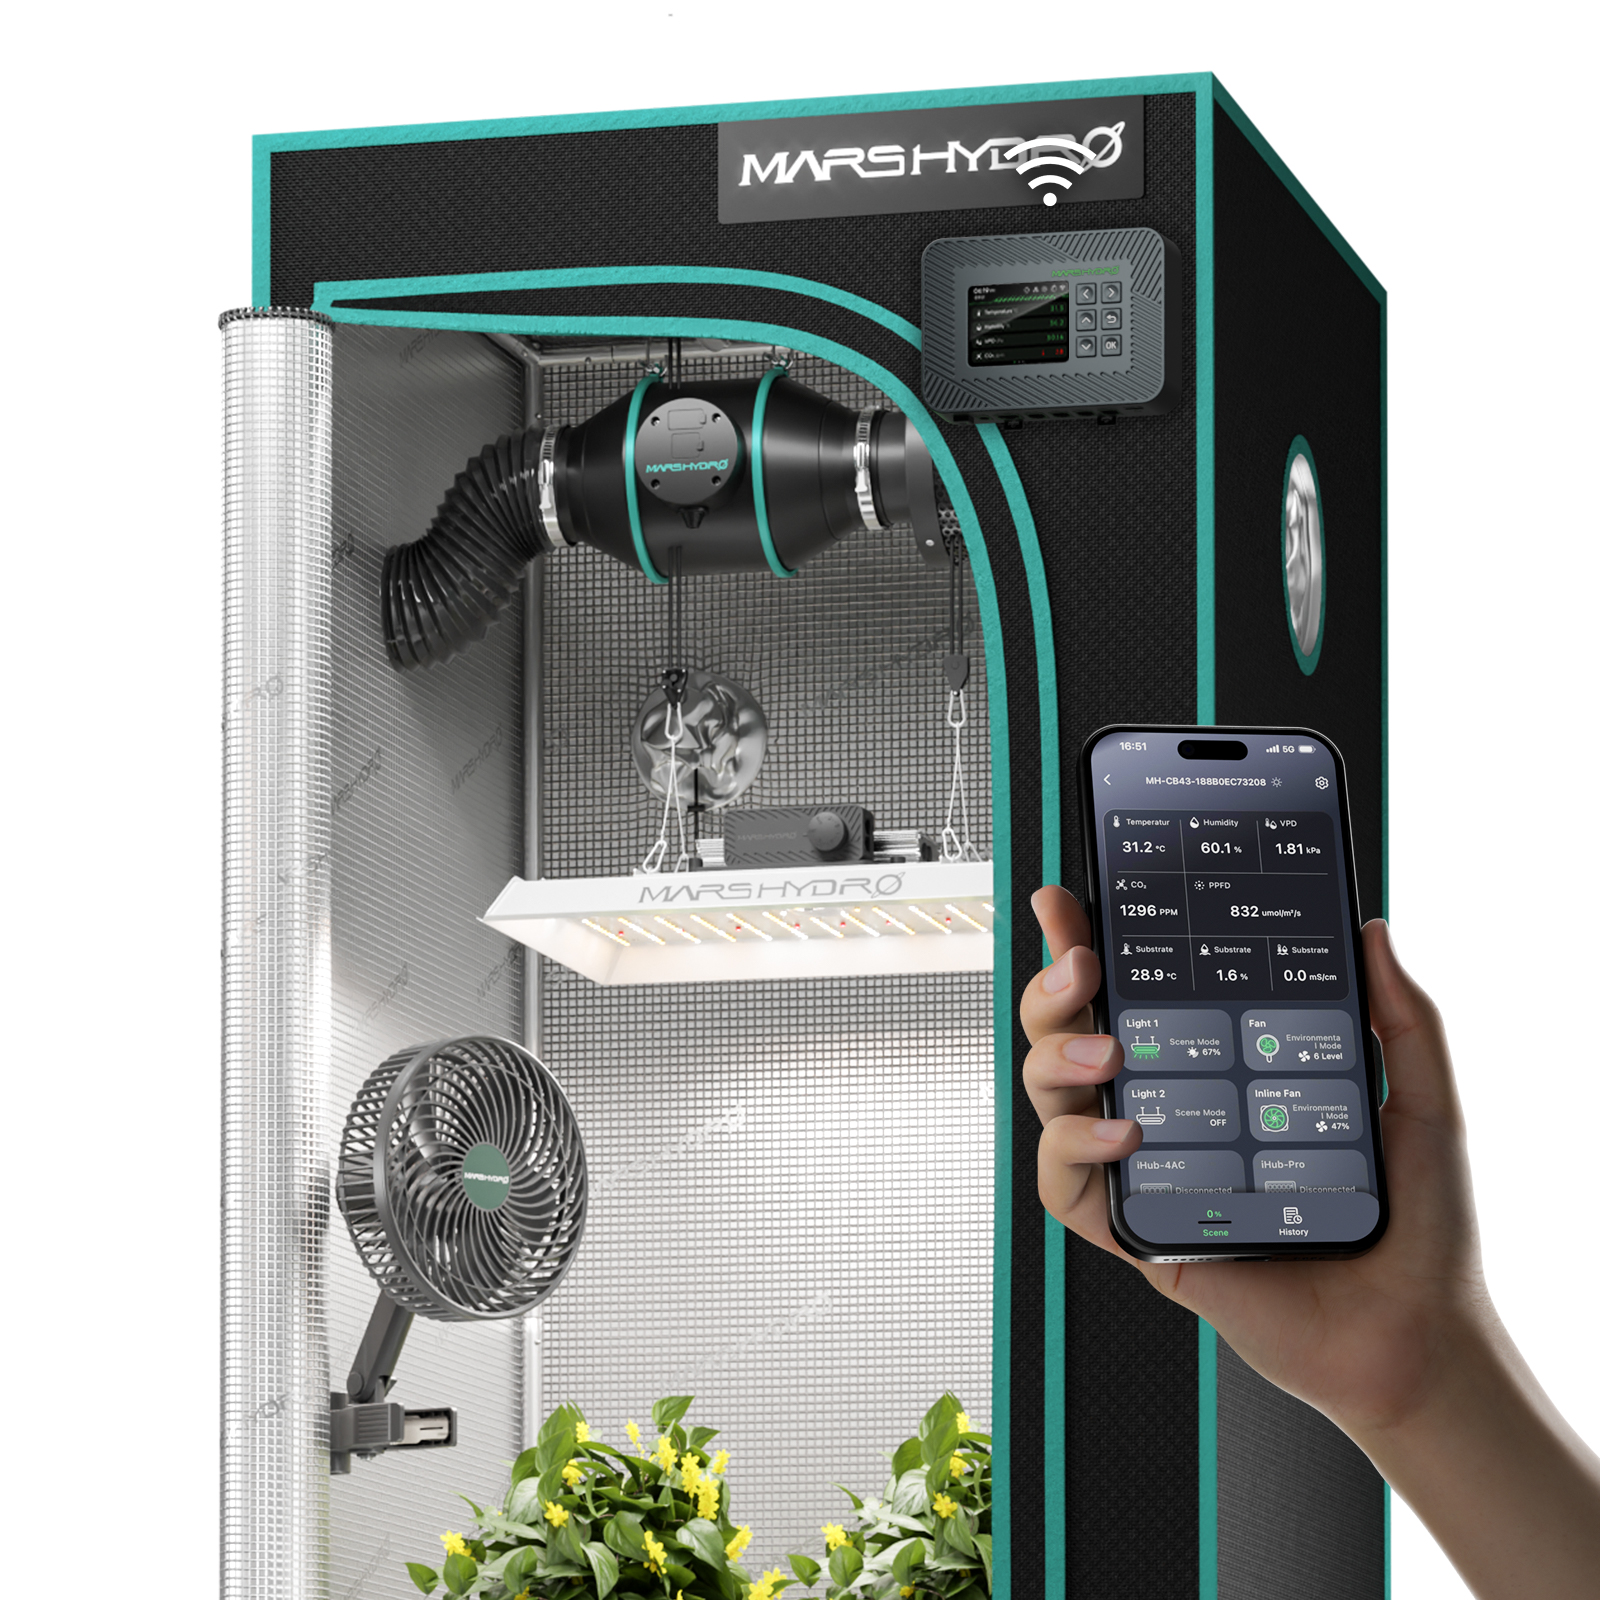
Complete Indoor Grow Tent Kit
Set up your indoor growing space with the TS1000 LED grow light, grow tent and smart controls.
2. FC3000 300W LED Grow Light
Best for: Growers who need stronger lighting for a 3 × 3 ft grow tent.
The FC3000 is a 300W LED grow light designed for indoor growing. It offers adjustable brightness and supports both vegetative and flowering stages.
Pros
Powerful 300W output for indoor growing.
Efficient LEDs help make good use of electricity.
Adjustable brightness lets you match light intensity to plant growth.
Cons
Best flowering coverage is around 2.5 × 2.5 ft.
Costs more upfront than a basic 150W grow light.

LED Grow Light for Indoor Plants
Explore the FC3000 300W LED grow light for indoor growing setups.
3. 4-Inch Inline Duct Fan and Carbon Filter Combo
Best for: Small to medium grow tents that need airflow and odor control.
This kit includes a 4-inch inline fan, an activated carbon filter and a speed controller. It provides airflow of up to 205 CFM, with a simple knob to adjust fan speed.
Pros
Fan and filter come together in one kit.
Adjustable speed makes airflow easy to manage.
Carbon filter helps reduce unwanted odors.
Cons
Best suited for tents up to around 3 × 3 ft.
Manual controls do not offer automatic adjustments.

Grow Tent Ventilation System
Improve grow tent airflow with an inline duct fan, carbon filter and speed controller.
4. iControl Smart Environmental Grow Room Controller
Best for: Growers who want to manage lighting and climate settings through one app.
The iControl connects compatible Mars Hydro devices through Wi-Fi and helps monitor temperature, humidity and VPD. It can automate settings and send alerts when conditions need attention.
Pros
Automates climate adjustments for less manual work.
Supports different settings for each growth stage.
App alerts help you monitor changing conditions.
Cons
Works best with compatible Mars Hydro devices.
Costs more and takes more setup than a basic timer.

Smart Grow Room Environment Control
Manage your indoor growing environment with the iControl smart controller.
5. iControl Smart VPD Kit
Best for: Growers who want better control over temperature and humidity.
This kit helps monitor Vapor Pressure Deficit (VPD), which combines temperature and humidity into one useful measure for managing growing conditions.
Pros
Helps track temperature and humidity together.
Makes changing growing conditions easier to monitor.
Works with the Mars Hydro iControl system.
Cons
Most useful when paired with a compatible iControl setup.
May be unnecessary if your controller already monitors VPD.
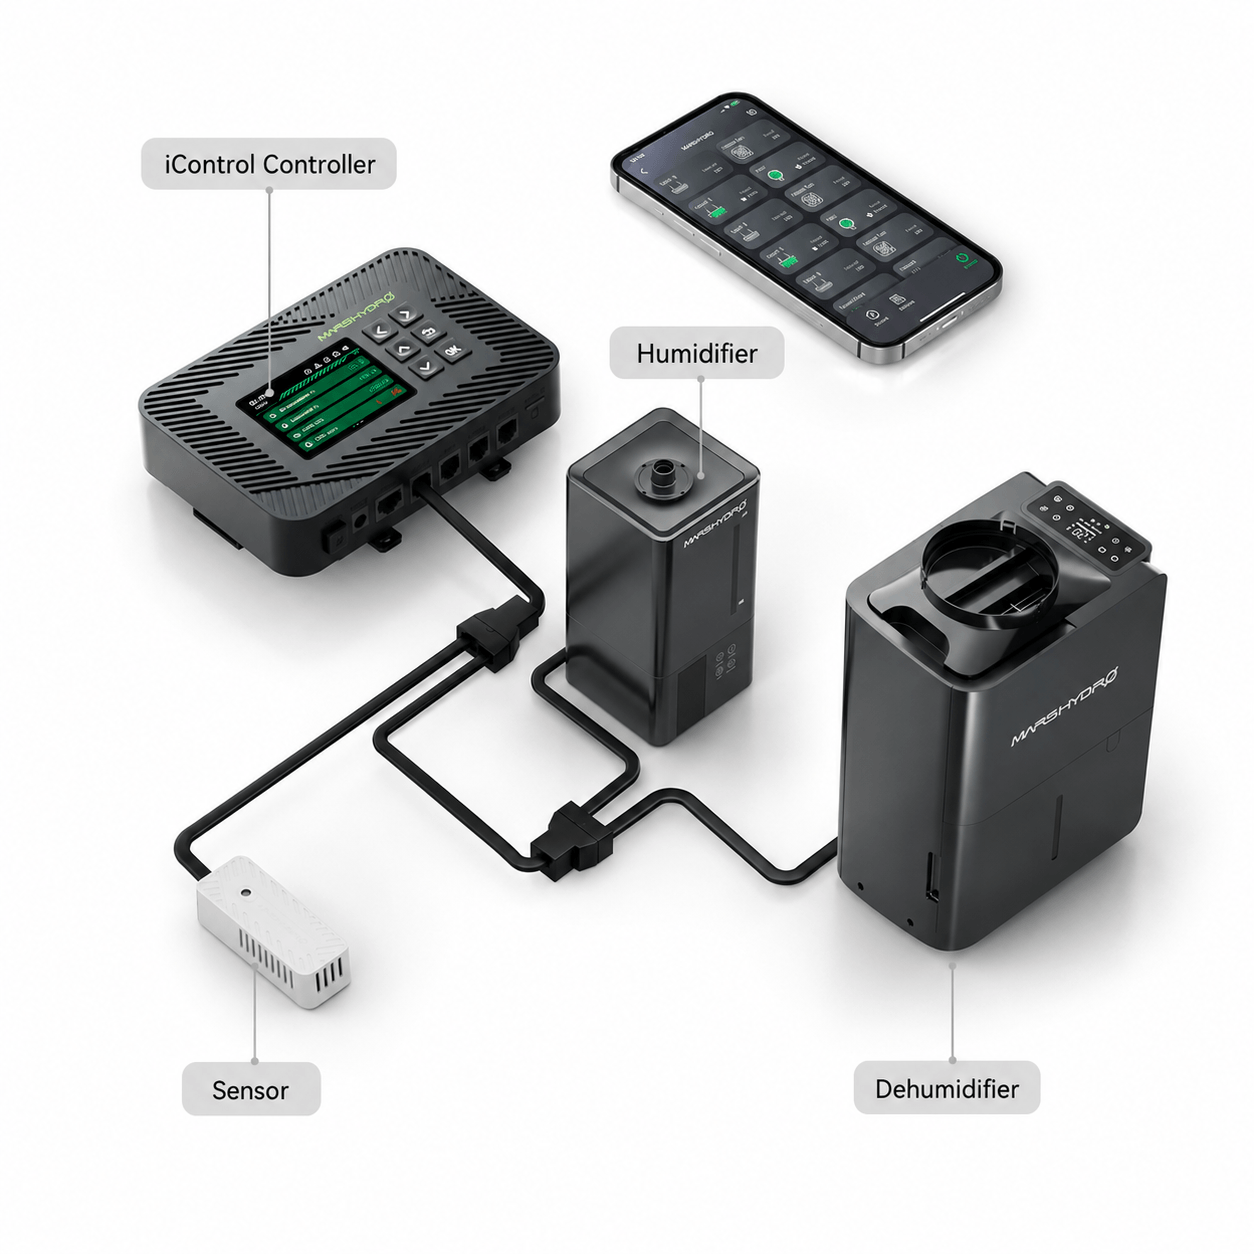
Smart VPD Monitoring Kit
Monitor growing conditions with the iControl Smart VPD Kit to help manage your indoor growing environment.
Complete Grow Tent Kits vs. Individual Equipment
A complete grow tent kit usually includes a tent, LED grow light, exhaust fan, carbon filter, ducting and basic accessories. The exact items depend on the kit.
Benefits of Complete Kits
Easy shopping: Get several essential items in one package.
Better compatibility: Components are usually selected to work together, but check their specifications.
Less hassle: Save time instead of shopping for every item separately.
Beginner-friendly: A kit can make your first setup easier.
Products embed
Possible Drawbacks
Mixed quality: Some kits may include better components than others.
Less flexibility: You may not get every feature you want.
Extra costs: Sensors, humidifiers or other accessories may cost extra.
Buying tip: Compare the light, fan, filter and tent specifications before choosing a kit. Buying everything together is convenient, but make sure the included equipment meets your needs.
Which option should you choose?
Your situation | Suitable option |
First setup with no equipment | Complete kit |
Limited space and a simple setup | Compact complete kit |
Already own a suitable light or fan | Individual components |
Need specific noise or automation features | Compare individual components |
Want to upgrade over time | Modular kit or separate equipment |
Before buying any kit, confirm the light's actual power draw and coverage, the fan's airflow rating, the tent's dimensions and which accessories are included. Do not assume that every product described as a complete kit includes everything you need.
How to Set Up Your Indoor Grow Tent
Once you have your equipment, follow a simple installation process.
Assemble the tent: Build the frame, attach the fabric and check the zippers, ports and supports.
Install the light: Secure the LED light according to the manufacturer's instructions and confirm that its height can be adjusted.
Connect the ventilation: Attach the fan, ducting and carbon filter if required. Secure all connections.
Position your sensors: Place the temperature and humidity sensor near the growing area, away from direct light and strong exhaust airflow.
Test the equipment: Run the system and check that the fan moves air properly and the controls work as expected.
Monitor conditions: Observe temperature and humidity before making adjustments to the setup.
Keep electrical equipment and connections protected from water. Follow each manufacturer's instructions and avoid exceeding the tent's weight limits.
Common Grow Tent Setup Mistakes to Avoid
A few simple mistakes can make an otherwise good setup harder to manage.
Choosing the wrong tent size: Measure your space and check equipment dimensions before ordering.
Buying a light based only on wattage: Compare coverage, PPFD information and actual power consumption.
Ignoring airflow: Check fan capacity and account for resistance from ducting and filters.
Skipping environmental monitoring: A basic temperature and humidity sensor helps you spot changes early.
Overbuying accessories: Start with essential equipment and add extras when you have a clear reason.
Forgetting running costs: Consider electricity use, replacement filters, cleaning and regular maintenance.
Ignoring equipment safety: Secure hanging equipment, follow load limits and keep electrical connections away from moisture.
A simple, well-matched setup is often easier to maintain than one filled with unnecessary accessories.
Final Thoughts
The best indoor grow tent setup is one that fits your space, budget and growing needs. Start with a suitable tent, choose LED grow lights with the right coverage and make sure your ventilation system can handle the space. Temperature and humidity sensors can help you monitor conditions, while smart controllers offer more automation when you need it.
If you are new to indoor growing, a complete grow tent kit can make shopping easier. If you already own some equipment or need specific features, choosing individual components gives you more flexibility.
Take time to compare specifications before buying. A well-planned setup can save money, reduce unnecessary upgrades and make everyday maintenance simpler.
Frequently Asked Questions
You generally need a grow tent, a suitable LED grow light, an exhaust fan, ducting and a timer. A circulation fan, carbon filter and environmental sensors may also be useful.
Choose a tent that fits your available space and matches your equipment's coverage. Smaller tents can be easier to manage, but the right size depends on your needs.
A complete kit can simplify shopping by combining the main components in one package. Check the specifications and included accessories before deciding if it offers good value.
Use a reliable sensor to monitor humidity and assess the room's airflow. A humidifier or dehumidifier may help when needed, depending on your environment and the plants you grow.